Creating Facebook posts can be very time consuming, especially if you do not follow a set plan. Before you know it, you have spent a large portion of your day posting on Facebook and scrolling through its addictive feed!
A lot of people make the mistake in thinking that in order to be successful on Facebook, you have to be on there all the time. This is not true at all, the only result that this gives is using up your precious time.
In this post, I am going to take you on a step by step tutorial on how to schedule Facebook posts for free using Buffer.
How To Schedule Facebook Posts For Free Using Buffer
Before we dive into the tutorial lets just explore a little bit about the software we are going to use; Buffer.
There are different online software available which allow you to plan and schedule your social media content, similar to a digital calendar. They are brilliant for many reasons but one of my favourites is that you don’t even need to go to your social media website to post your content. The software does it for you! This removes the distraction of seeing all of those eye-catching posts that people share, that take up your precious time.
Although you can use Buffer for a range of different social media networks, in this article we are going to focus on how to schedule Facebook posts for free.
Schedule Facebook posts for free with Buffer
If you haven’t done so already, now is the time to head over to Buffer and create your free account!
You will need to sign up to the free 7-day trial, however, once your trial has finished, instead of continuing with the paid plan, you can downgrade to the free plan.
The free plan allows us to 3 social accounts and 10 scheduled posts. If you need more account access than the free plan offers, the pro plan allows up to 8 social accounts and 100 scheduled posts from $15 per month.
Once you have done that, come back and follow the rest of this tutorial so that we can get your first post scheduled.
Scheduling your Facebook posts: 3 Benefits
1. Consistency
When you are scheduling your Facebook posts, you are essentially planning ahead. One of the main benefits of this is maintaining your consistency and quality of posts.
E.g. Every Monday, if you consistently schedule your Facebook posts for each day of the week, as a result, this will build consistency for your account. You can carry on with your day to day life for the week and if you get busy, there are no concerns as you have already planned and scheduled your content for your Facebook account.
Another bonus of scheduling your Facebook posts is that because you have planned your content in advance, this allows you to create high-quality content. In contrast to posting each day with no plan, where you post anything because you want to get it done as quick as possible.
2. Increase productivity
Scheduling your Facebook posts allows you to become more efficient. You can block off a certain amount of time on one day each week, whereby you schedule your content. This allows you to plan your time more efficiently and increase productivity.
With different paid Buffer plans, you can schedule more posts. As a result, you can use one day per fortnight, or even one day per month, to plan and schedule your content for the following fortnight/ month.
3. Reach a wider audience
As you are planning your content in advance, as part of this process, you can edit your posting schedule. This means that you can target certain times of the day for sharing your content.
E.g. If you know that a large part of your audience is based in another country. You can edit your posting schedule to target the times of day appropriate for your audience. Which means that you don’t have to remember at certain times of the day to post manually, or even post in the middle of the night. Plan, schedule and forget about it!
Schedule Facebook posts with Buffer – A quick 6-step tour
1. Buffer Dashboard
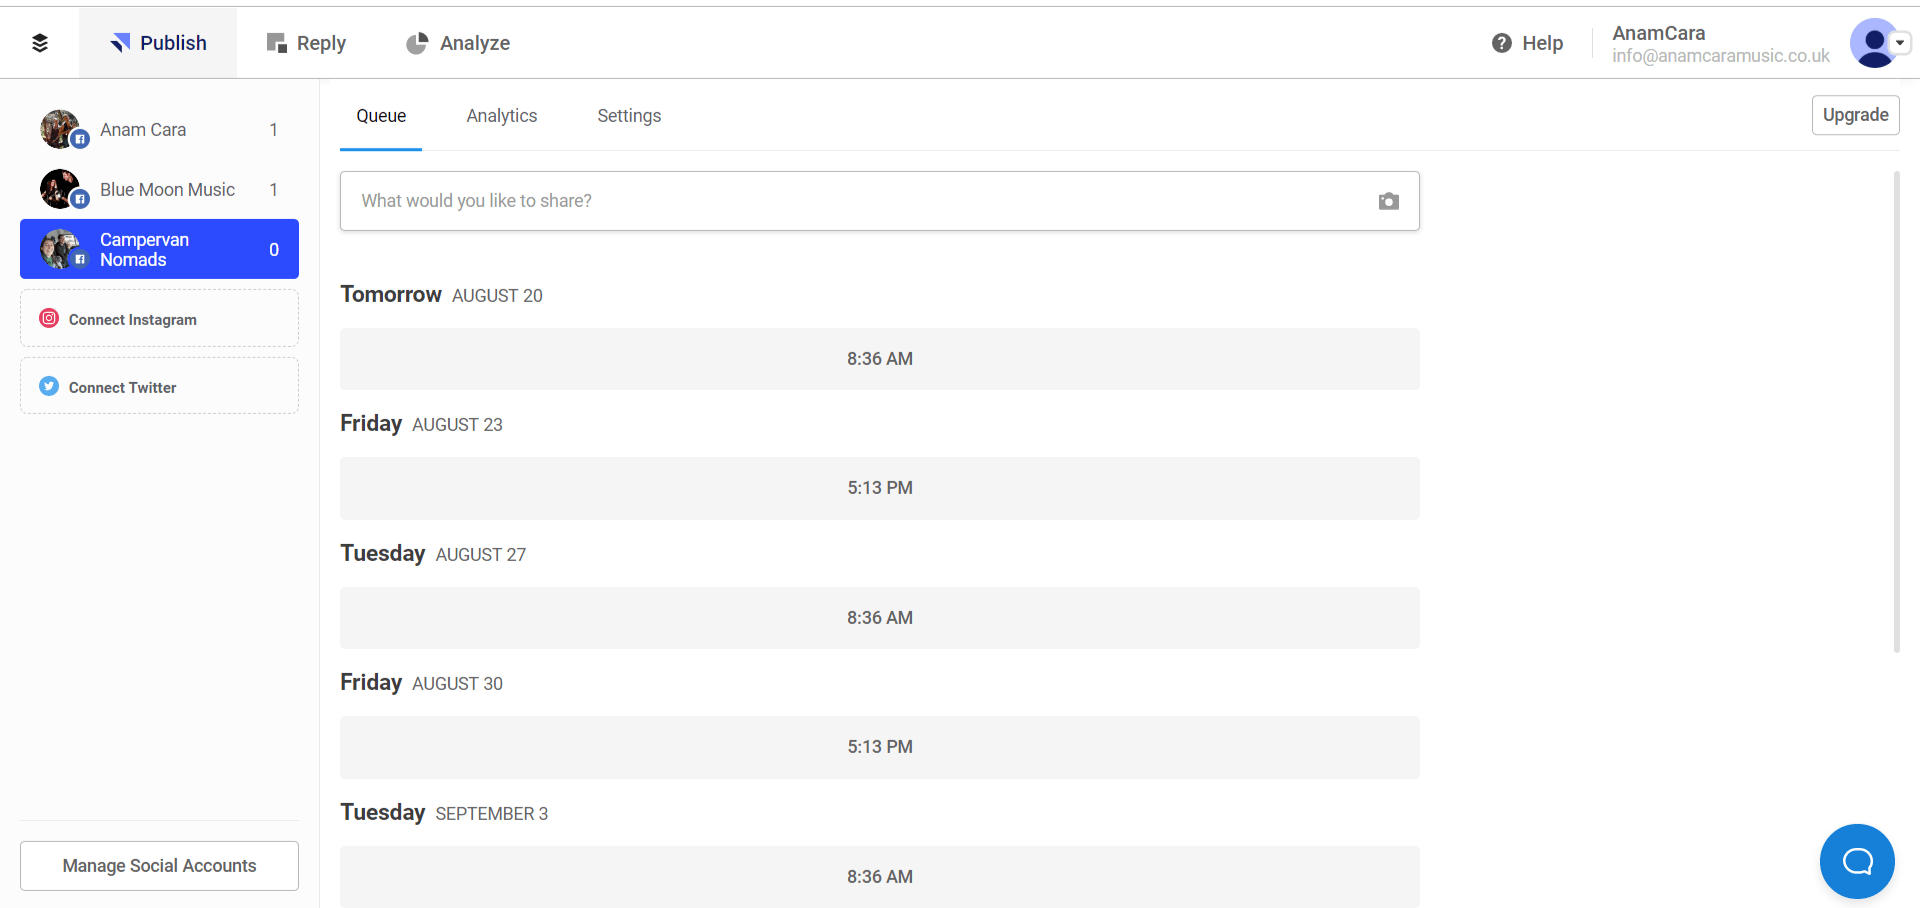
Once you have created your account, when you log in you should arrive in your dashboard.
Here you can see the different social accounts that you have set up on the left-hand side. This is also the main page where you can write and schedule your posts. At the very top, the Reply and Analyze links are reserved for paid subscriptions. However, you have everything that you need right here to schedule a post.
The Queue link allows you to see what is already scheduled. As you can see above, there is nothing in the queue at the moment but we will change that soon.
There is also a link for analytics and settings which we will explore later in this post.
2. Connecting your Facebook page
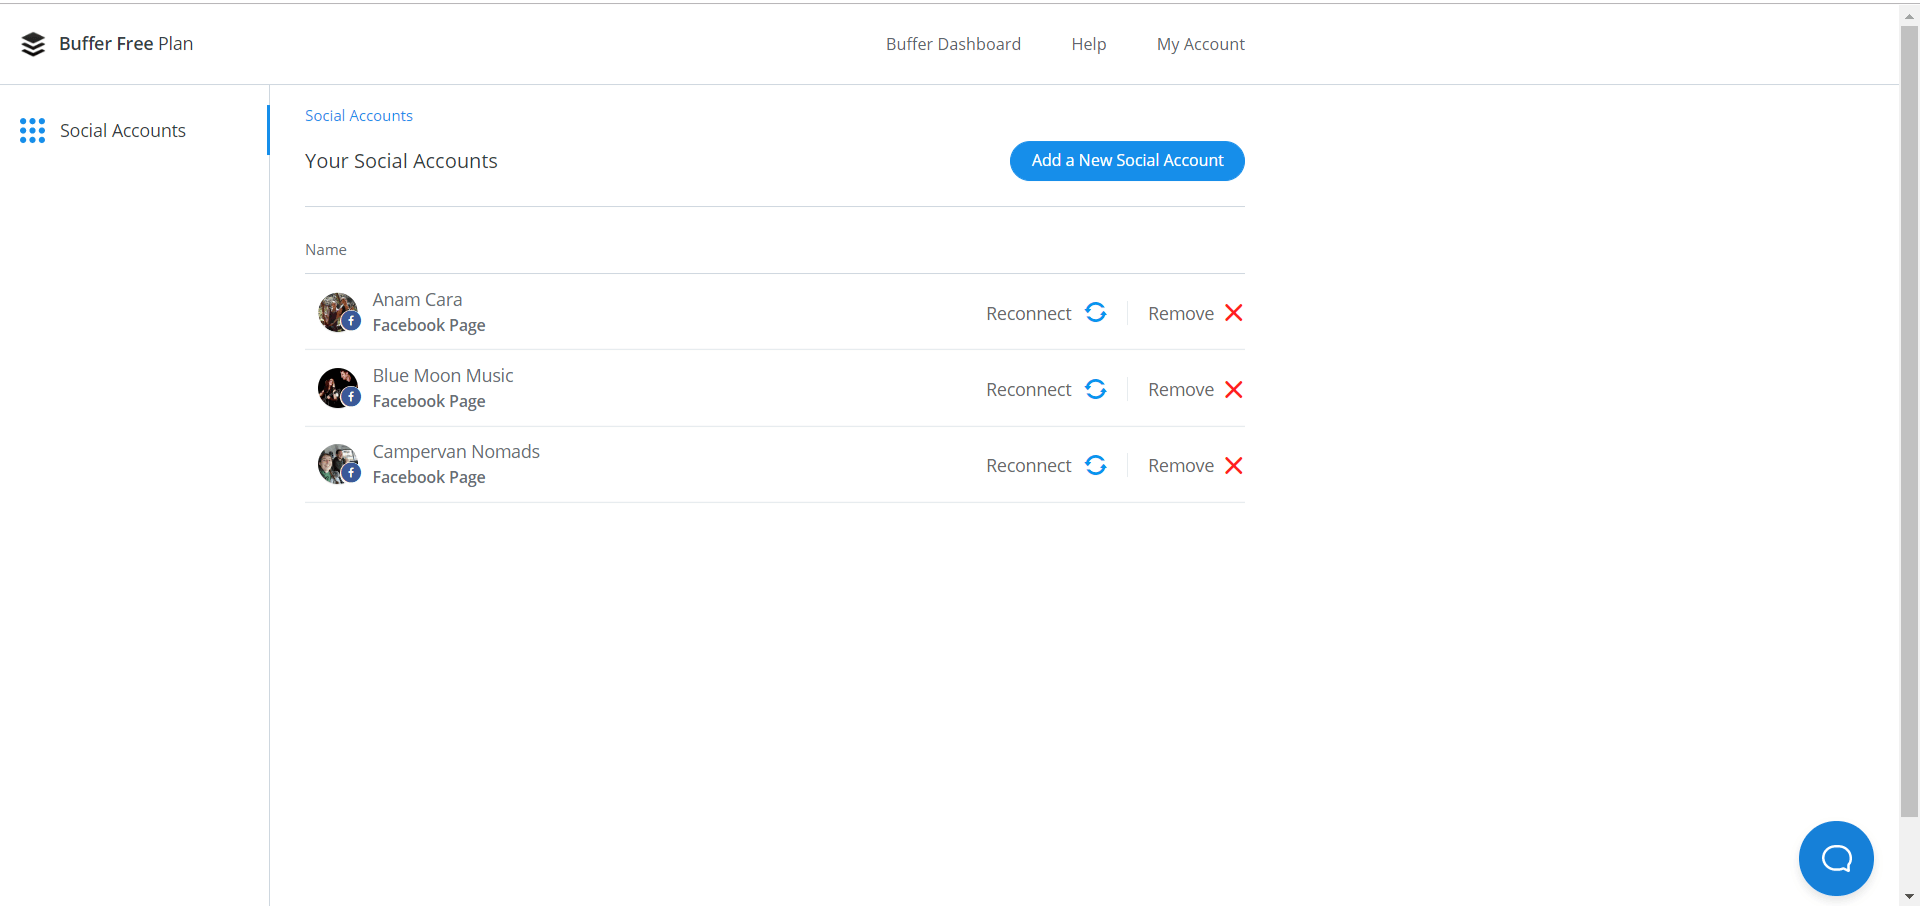
From your dashboard, when you click ‘Manage Social Accounts’ you arrive at this page.
As you can see, I have already linked my different accounts to my Facebook page. To add a new account, simply click ‘Add a New Social Account’. This will take you to a Facebook login page, and also a confirmation page, where you click to allow Buffer to access your Facebook page.
Following this, you will be redirected to Buffer where you can start scheduling posts.
On this page, you can also reconnect to social accounts, if you lose a connection. On the other hand, you can also remove a social account if it is no longer required.
3. Want more social accounts or features?
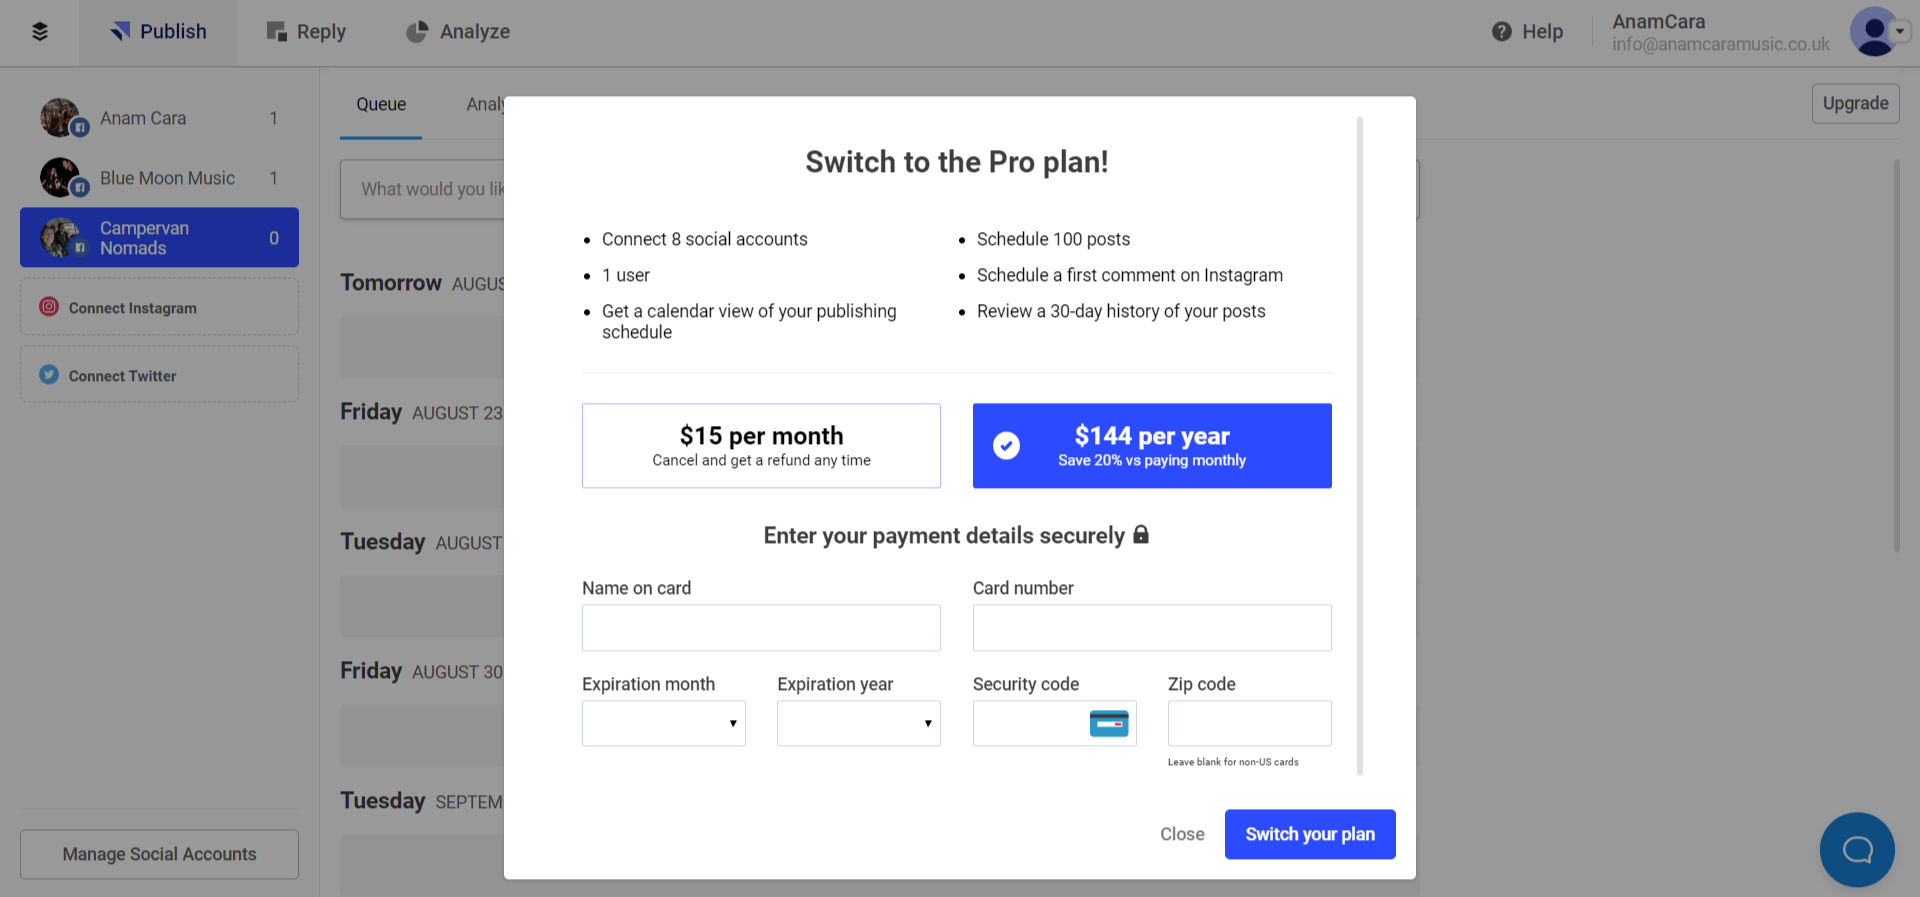
As I have mentioned above, Buffer also offer paid plans which include additional social accounts and the ability the schedule more posts along with additional features.
This may not be required for what you need but you can find out more information about the paid plan from this link!
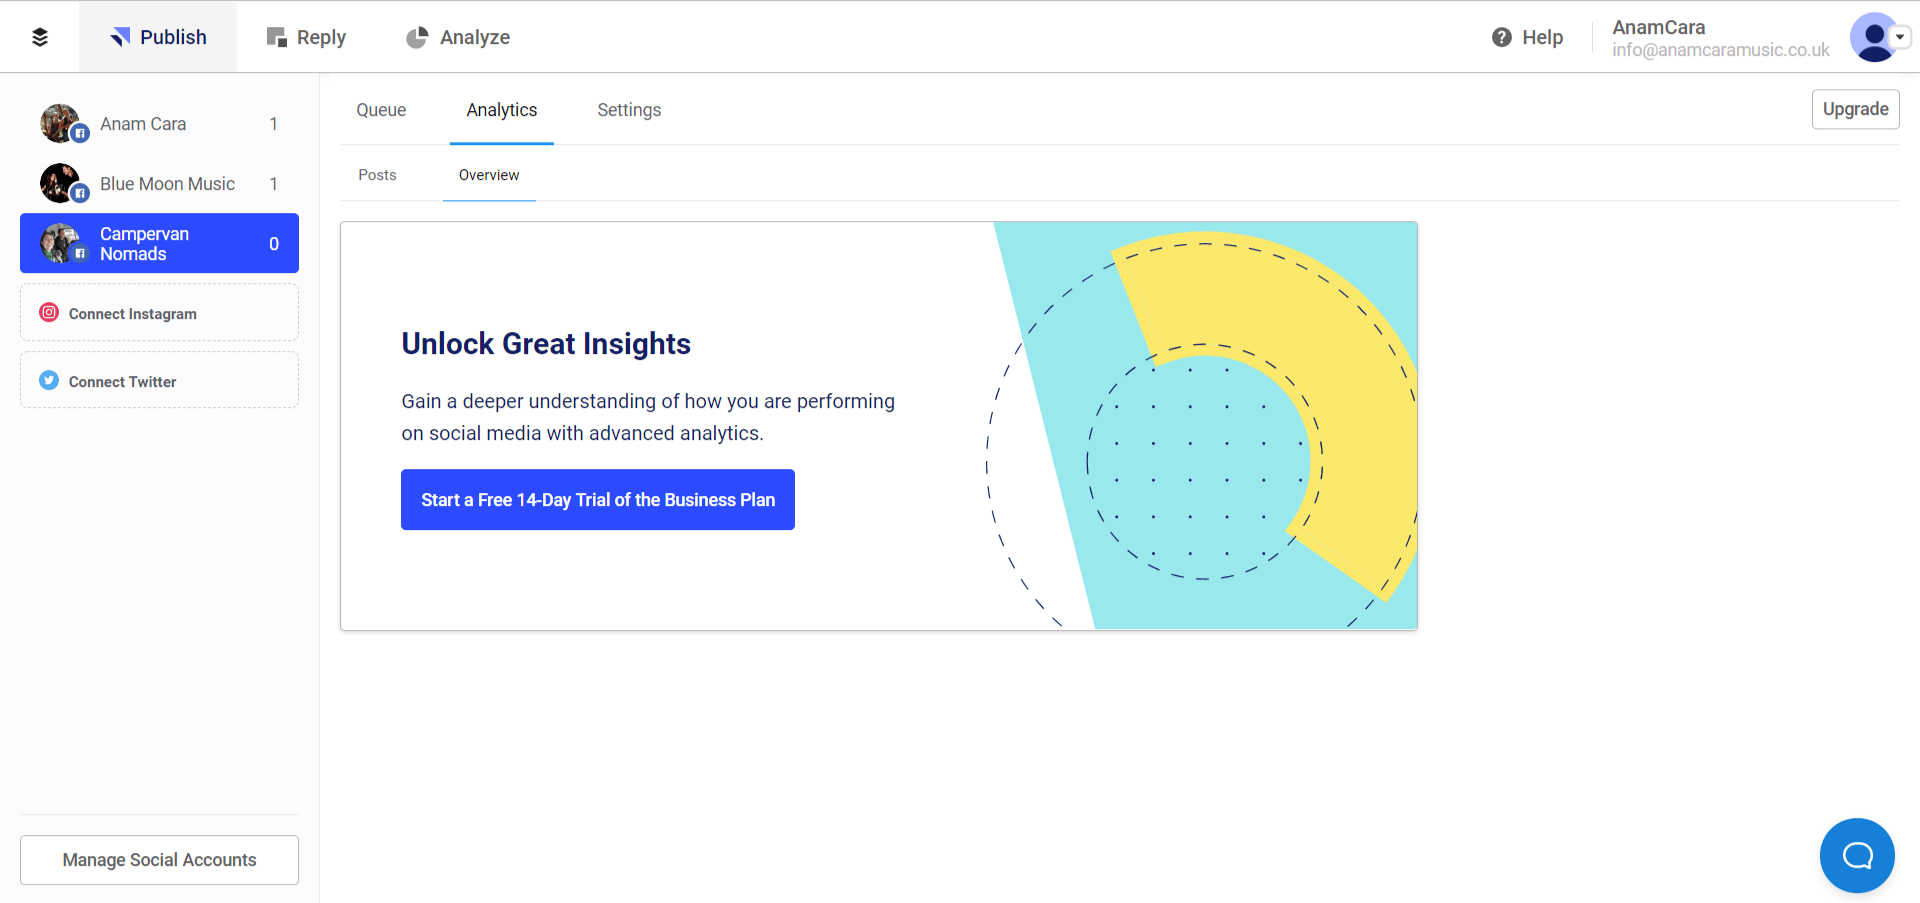
4. Facebook posts analytics

As you schedule Facebook posts, over time you can view what content you have posted in the analytics section.
This is very useful because you can quickly forget what content you have created when you are posting regularly, even in the space of a week. This page allows you to see what you have already posted so that you can avoid duplicate content.
In the paid plan, you can also view extra stats for each post. Including; comments, likes, shares, clicks and reach.
5. Buffer settings
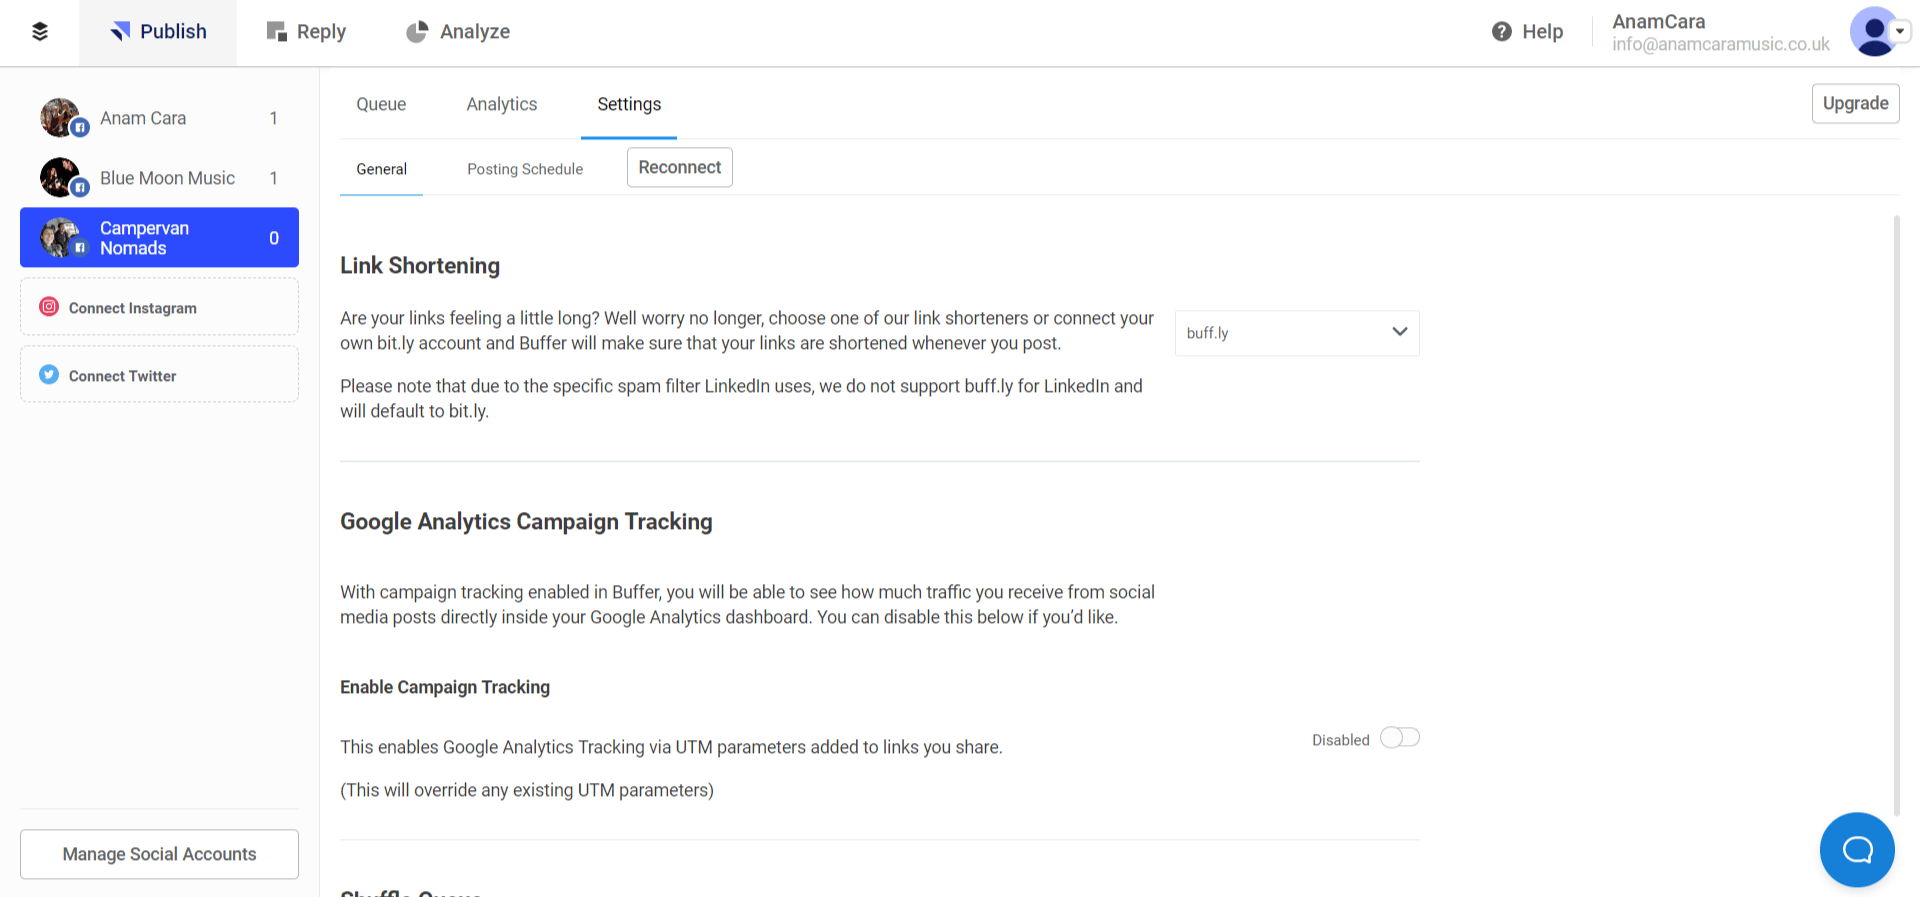
In your settings tab, there are two options, general settings and your posting schedule.
In your general settings, you can choose whether or not you would like your links to be long or shortened. Indeed shortening your links make a better more concise post, without having long spammy looking links.
You also have the option to link up to Google Analytics if you want further technical insights on analytics. As well as the option to shuffle your queue.
6. Buffer Posting Schedule
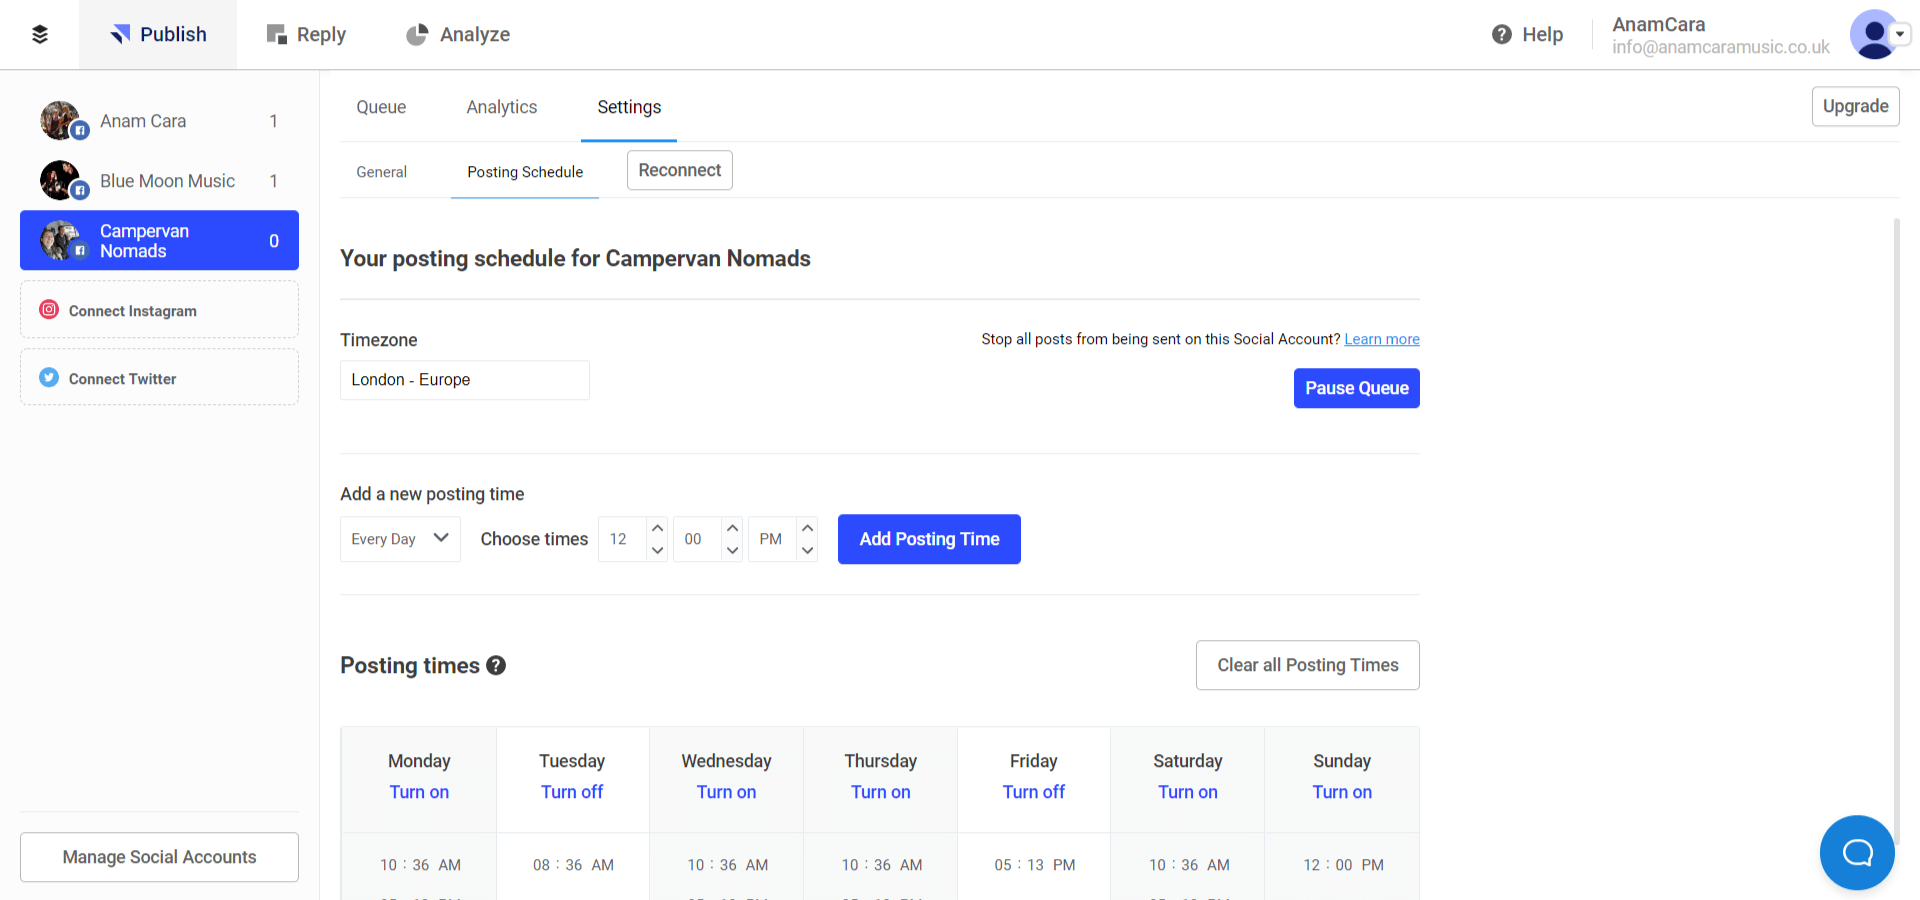
This is a very important step for scheduling Facebook posts.
This step is essential as it allows you to customise the days and times that your scheduled posts are actually posted.
At the top, you can choose your timezone. In addition, you can either edit the preset days/ times shown, or you can add a new posting time.
This very versatile interface gifts you with a lot of customisation, where you can choose to have posts scheduled for certain days and times each week. You can even select multiple times in one day.
Remember that there have been studies and research carried out to determine the optimum posting times for Facebook. Click here to read more about the best times to post on social media.
If you would like some more information on the best times for social media, check out the free workbook below, which also includes a content planner and content calendar to equip you with everything you need for social media domination!
Schedule Facebook posts in 3 easy steps
1. Go to your Buffer dashboard and select your social account
2. Create your content
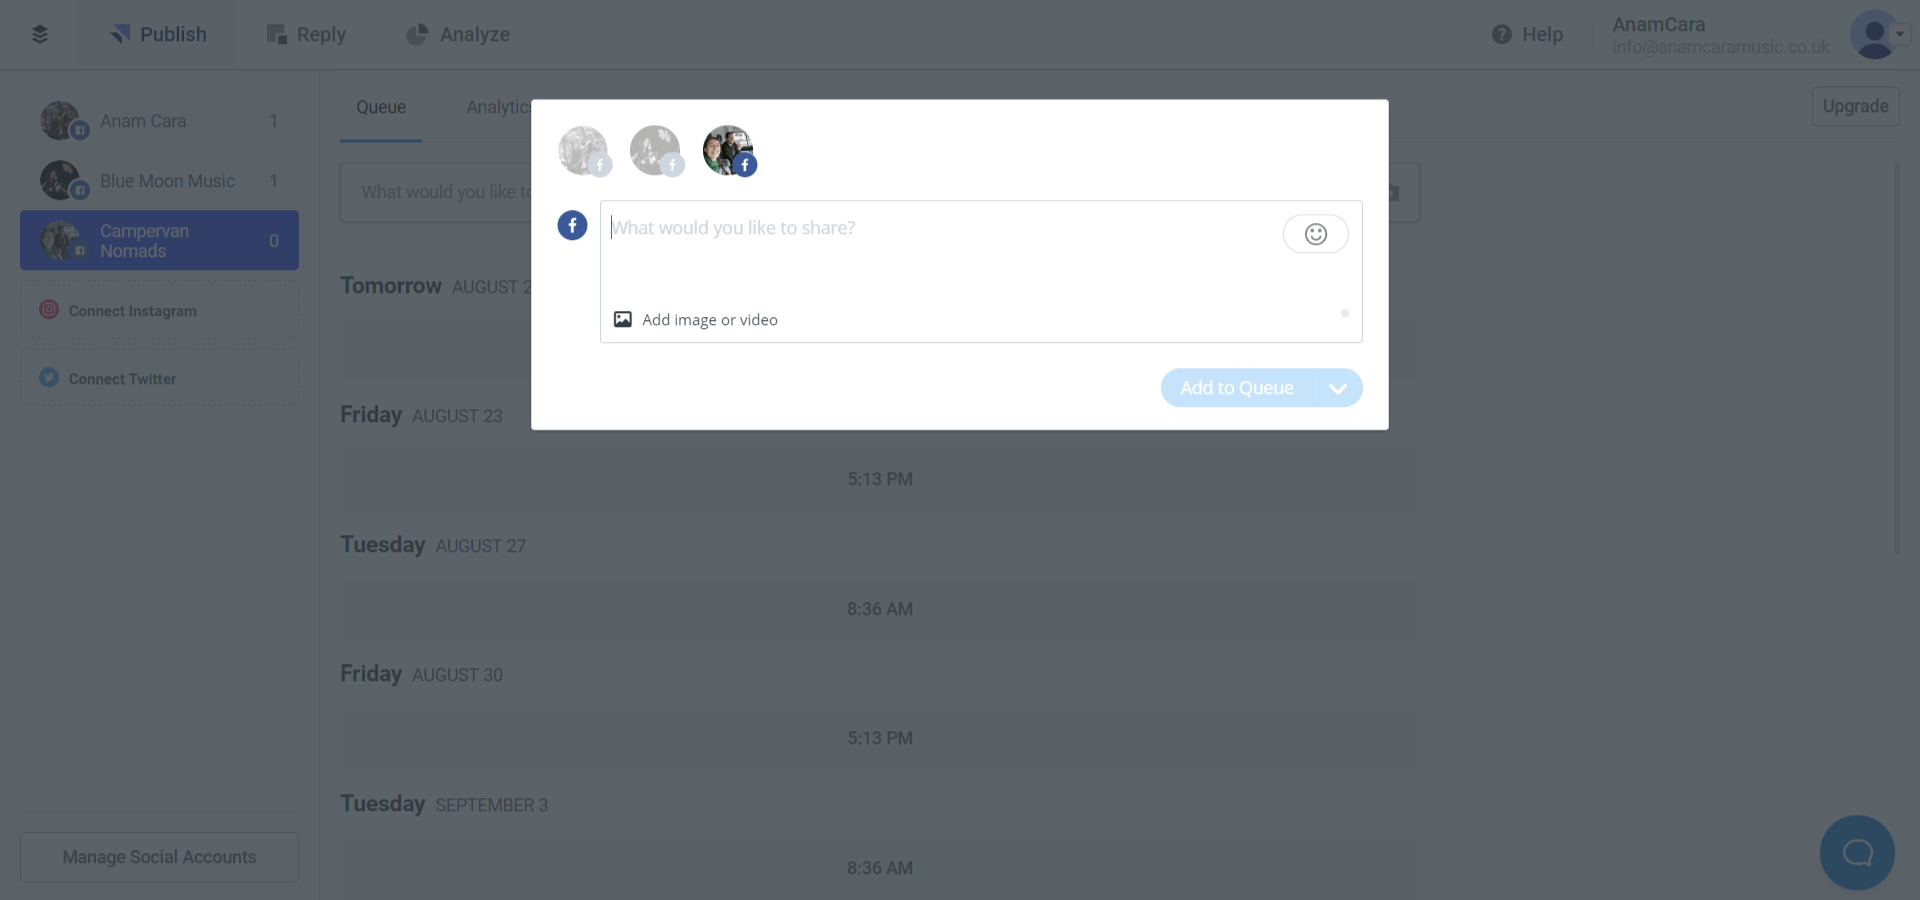
You have a variety of options on what content to create. You can write out some text, add images or videos and also add links to other articles etc.
If you add videos through Buffer, they will appear on your feed as though you have uploaded them directly to Facebook, which is very good for reach and engagement.
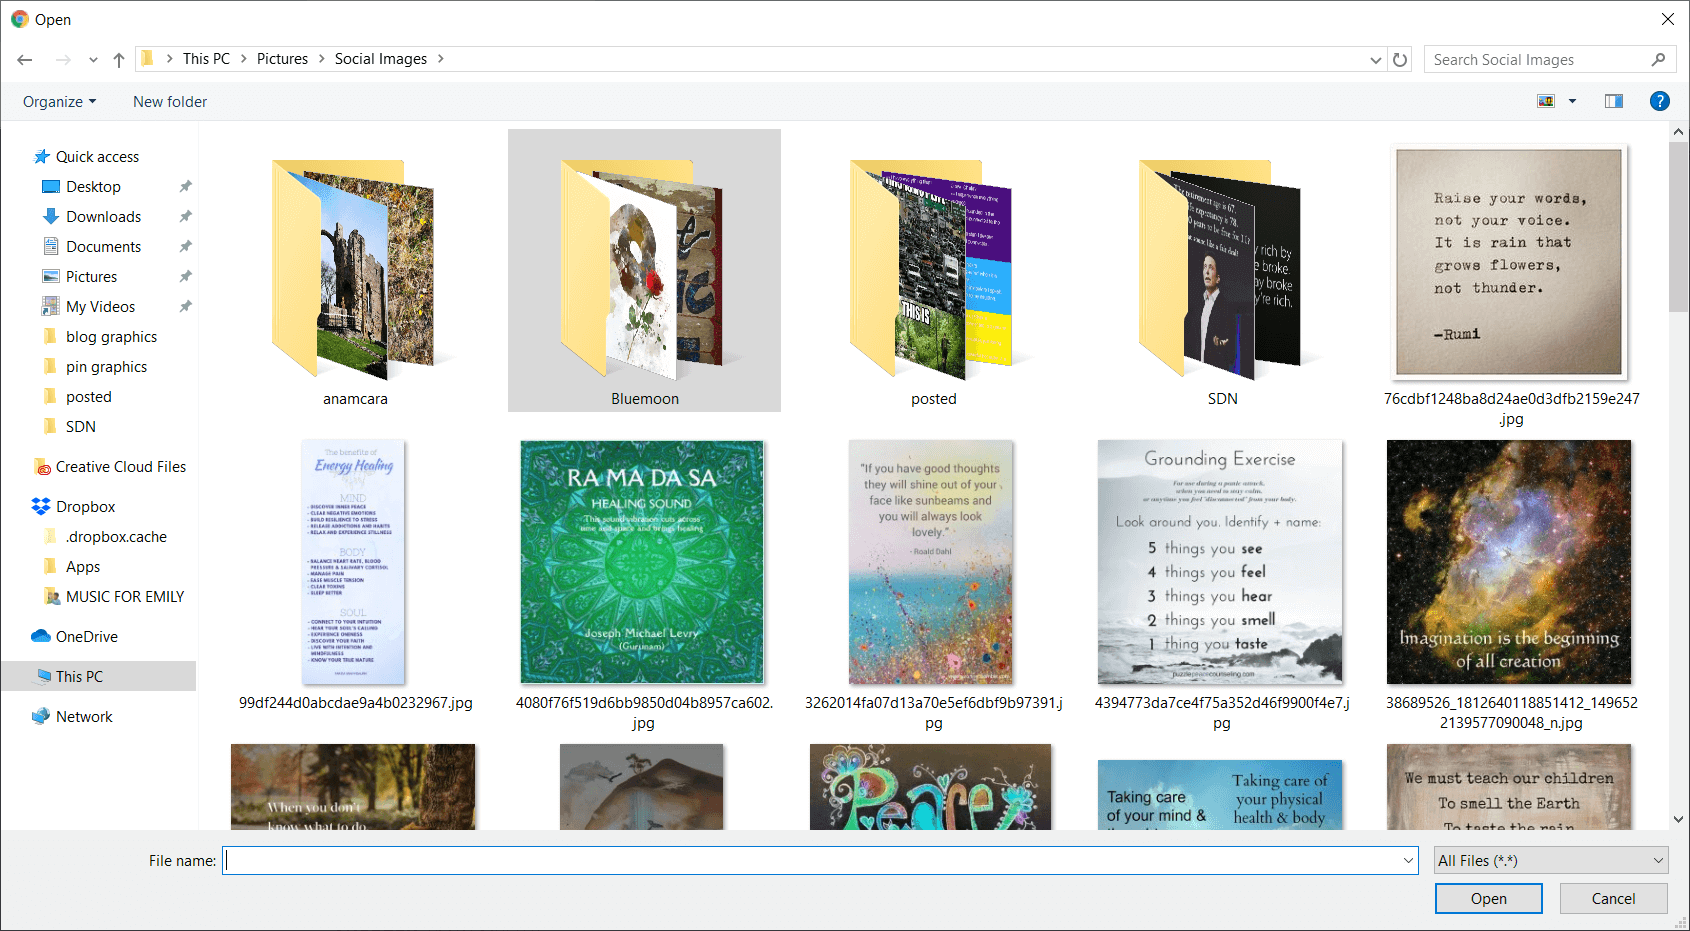
TIP: Organisation can really help when creating content to share. I have a folder of relevant images/ videos for sharing, for each social account. I also have a folder within the original folder called ‘posted’. Allowing me to clearly see what content has been shared and what hasn’t, which saves a lot of time!
3. Schedule your post
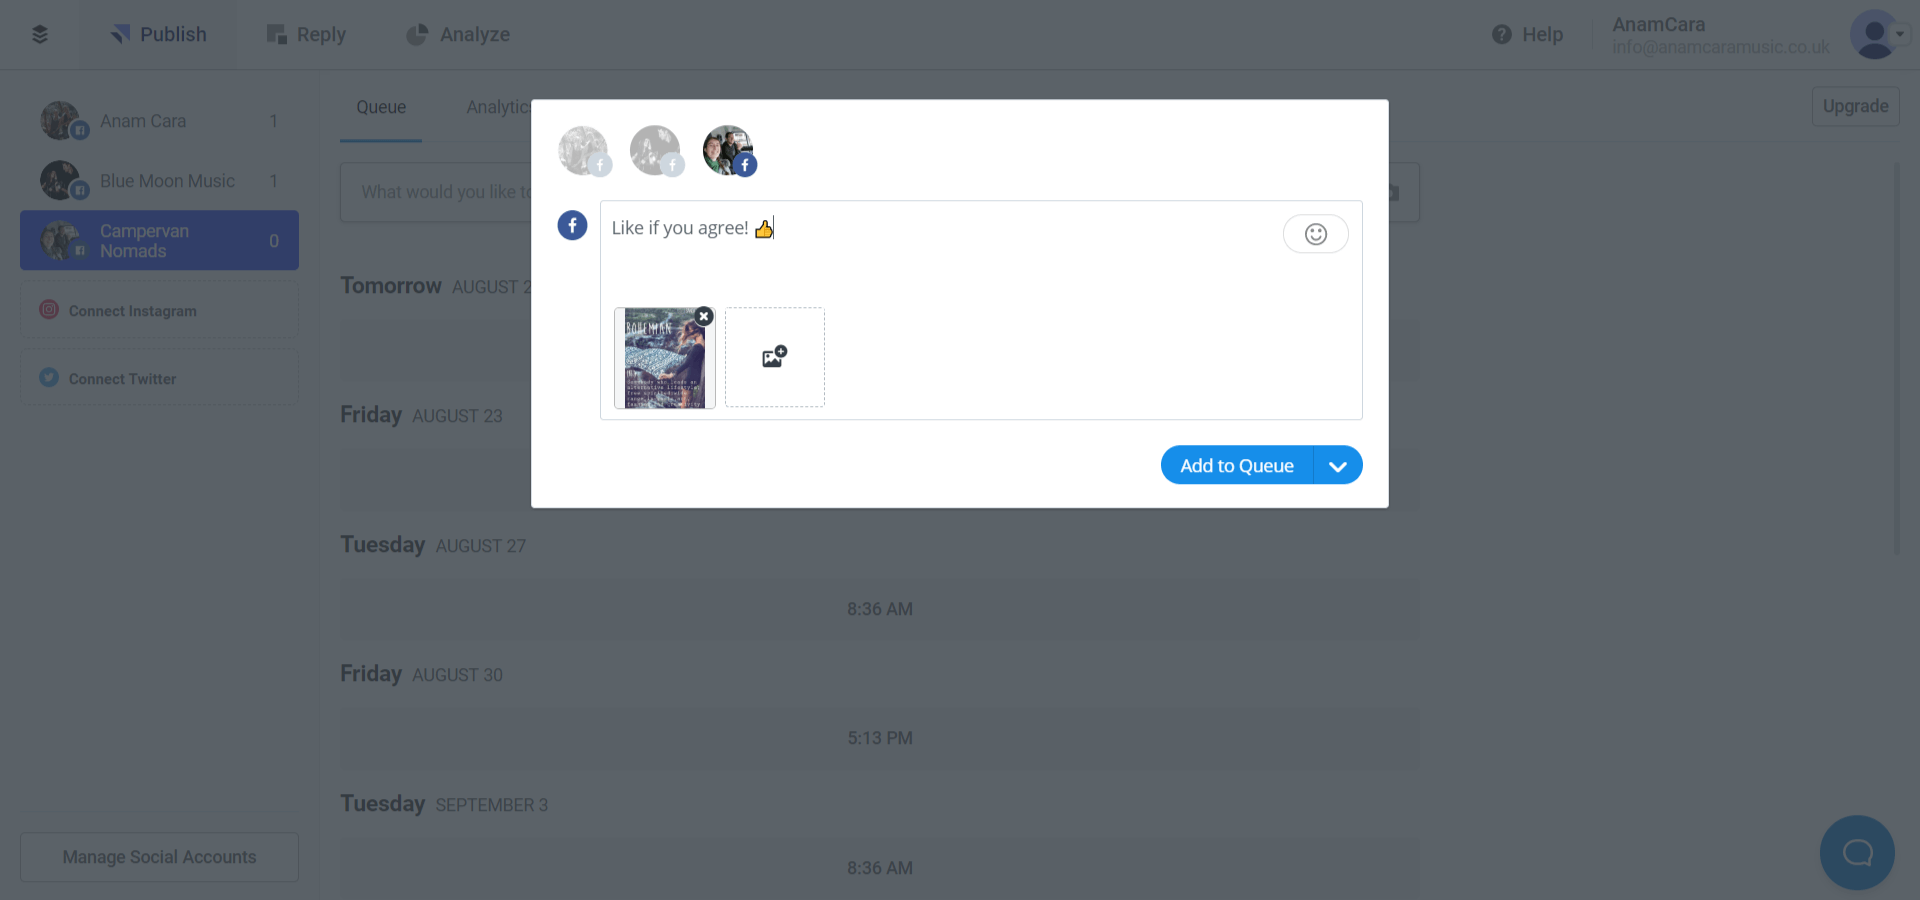
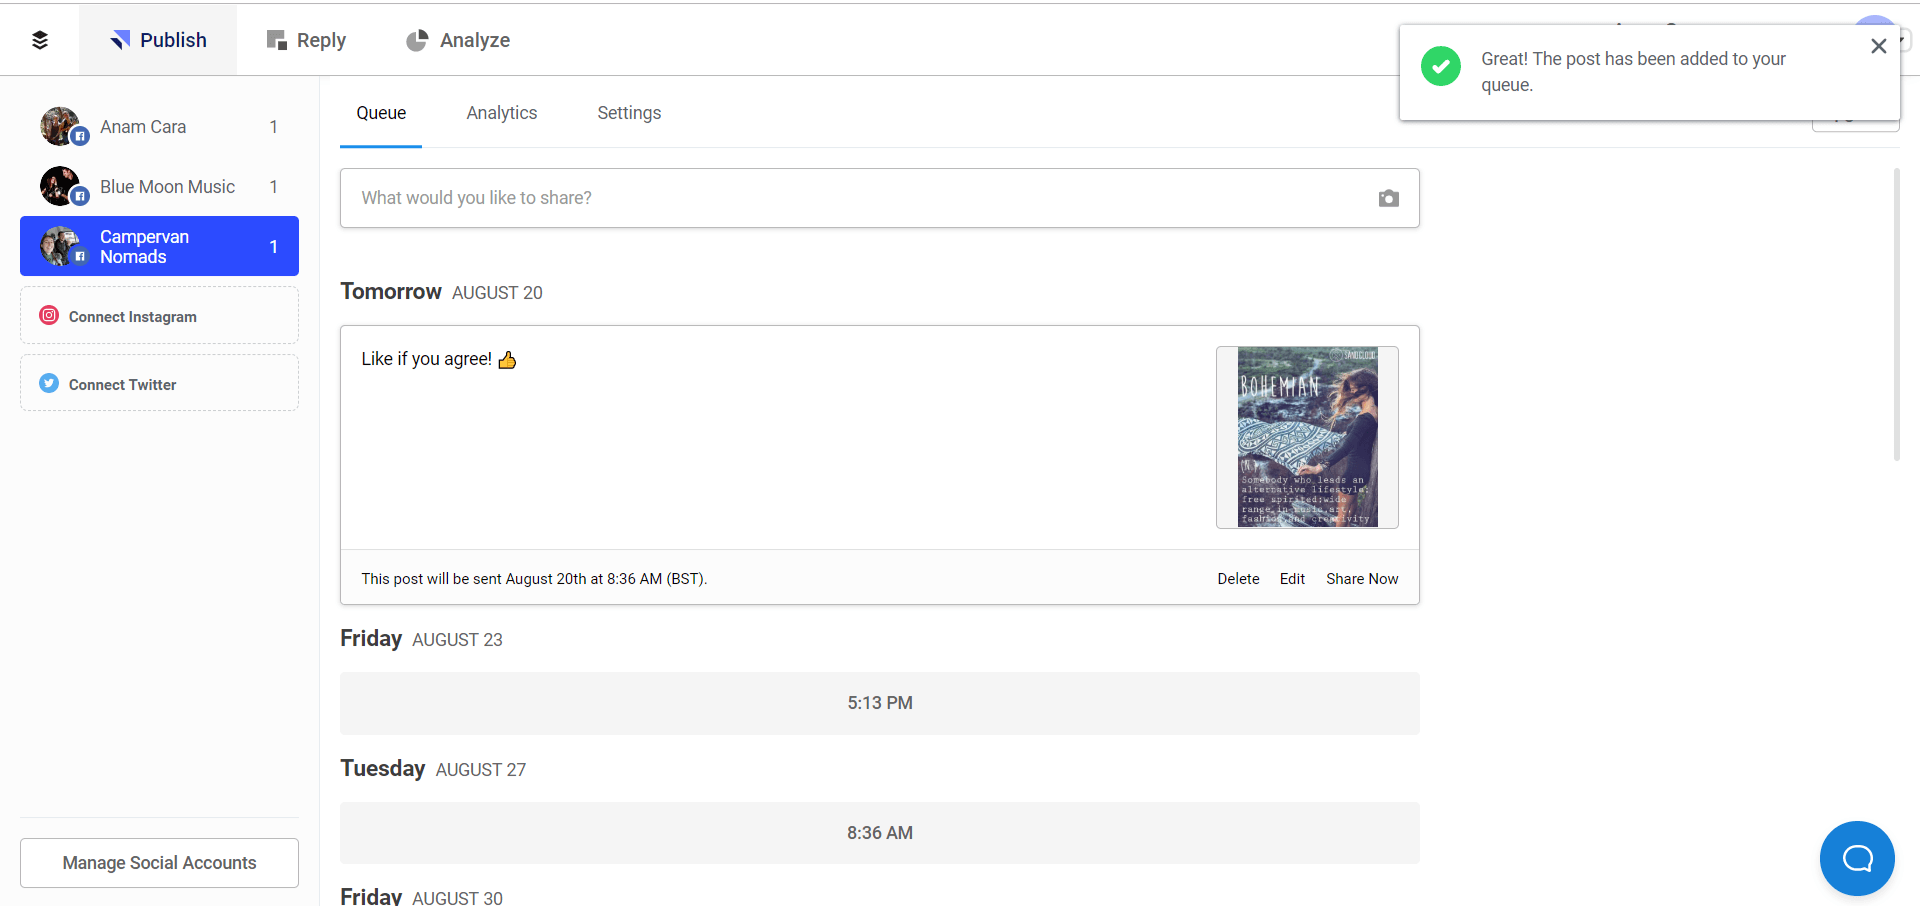
Once you have uploaded your image and added some written content, you can ‘Add to Queue’. Make sure that you have the correct social account highlighted above before you click to schedule your post.
Once you have scheduled, you can see your content from your dashboard, in your queue ready and waiting for the correct day and time to post automatically to Facebook.
Now you can simply repeat this process to fill your queue for the week, fortnight or event month in advance!
BONUS: How often to post on Facebook
With all the great features of the posting schedule, this can make you wonder “How often should I post on Facebook?”…
It can depend on your requirements, your audience preferences and your ability to create new content. Some accounts are satisfied with 3 posts per week, others 5 and others require a post per day.
The main reason to post regularly is to increase engagement on your account through traffic, shares and reach. Logically, the more often that you post, the more engagement you are going to receive on your page. Furthermore the more growth you will see on your page.
CoSchedule created an article where they collated research, studies and data from 14 different sources to conclude the optimum post frequency for Facebook.
And the verdict…
It is advised to post to Facebook once per day. Any more than twice per day can look spammy and have negative effects.
Furthermore, between 1:00 pm – 4:00 pm is advised to be the best time to post to Facebook.
You can monitor your posting strategy through your Facebook analytics. From your Facebook business page, click on insights and posts. From here you can gain an insight into the engagement for each post. In addition, you can determine whether your engagement increase or decreases from how often you post.
Ready to schedule Facebook posts for free?
I hope that you found this article useful and that it helps you to plan your content, continually increase your Facebook page engagement whilst saving you time!
You may enjoy these articles if you are looking for further reading…
21 Engaging Facebook Post Ideas
Everything You Need To Know About Email Marketing
Meanwhile, be sure to sign up to our newsletter below to receive a free PDF social media workbook. Including post ideas and a free content calendar!
Until next time!
Emily x